Showing posts with label crafts. Show all posts

Rustic Pottery Barn knock off

Hey HEY! The Before and After Party is going strong – be sure to check it out and link up! SO MUCH fantastic inspiration!

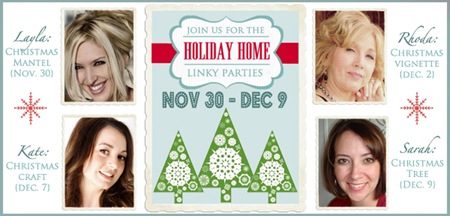
It’s time for another holiday link up:

Holiday_Home_Banner_2

We’ve seen some amazing mantels at Layla’s, beautiful vignettes at Rhoda’s, and now I can’t wait to see all the crafty goodness at Kate’s!

I was inspired by this project months ago when I got a Pottery Barn catalog and saw this:

It is three by three feet, and it was one of those made me say “Oh come ON!” out loud. :) Especially because of the price – I can’t remember what it was, but it made me freak out just a little bit.

I knew I wanted to recreate it, and initially I was going to use some big honkin’ cardboard letters like I used for my Ballard-esque monogram.

But wow…they are BIG. :) So I got to thinking and went a new direction…and I love the new direction.

I had some luan scraps in the garage and cut one to the size I wanted:

Ignore the awful tree drawing on the back – that was a project that never happened. ;) Trust me, that’s a good thing.

I had some leftover paintable wallpaper from a project in the Bub’s room, and decided to cover the board with it:

I found some letters at Joann’s that weren’t monster size, in a font I loved. I spray painted them and some leftover trim a festive red:

But because I wanted to display this project in our family room (which has a slightly rustic vibe for the holidays), the bright red wasn’t the look I was going for.

Enter my friend Beth’s sister and her take on this same project! I loved how she darkened her letters just a bit, so I did the same. LOVE when I find what I need when I’m not even looking! :)

I used some burnt umber craft paint:

And I mixed a bit of water in with it:

Then just brushed it on with my foam brush, and wiped most of it off. The top is before, the bottom after:

I did the same with the letters, but didn’t wipe nearly as much off. The wood was rougher and soaked it up a bit more, which I liked:

I arranged the trim and letters how I wanted, then attached them with my nail gun (but you could also glue them on!).

I’m really pleased with how it turned out!:

pottery barn noel knock off

Is it still considered a craft if I used major power tools to create it? Hmmmm…

A trip to Joann’s and craft paint were involved, so I say YES. :)

I did a little rustic vignette with our new art on the Craigslist dresser. The sled was a find years ago at a farmhouse down the street that used to have the GREATEST sales:

It was five bucks and I love it so! The little mittens were supposed to be ornaments:

The little tree used to sit in the kitchen, but I thought it was perfect here:

I know little candy ornaments don’t exactly scream rustic, but I’m working with what I’ve got here peeps! :)

I mixed some ornaments and pinecones in a lovely bowl I got a while ago from Meijer of all places:

I am loving their kitchen/serving aisles lately!

And all together, it’s a slightly rustic, Pottery Barn knock-off, using what we have Christmas vignette!:

rustic Christmas vignette

The letters were $1.99 each, I think? I had everything else. :) I luuurve that font for those letters, especially the little curl on the “O” – too cute! Altogether it took about 90 minutes to put together, but I did it over a few days.

Don’t you LOVE taking something you love in a catalog and making it your own for a few bucks?! Awwww. yeah.  :)

Can’t wait to see your crafty projects at Kate’s! And don’t forget we’re wrapping up the Holiday Home parties later this week with my Christmas tree party. WHOO!

P.S. Jess did a version of this too, and it’s identical to the PB one – for eight bucks!!

P.P.S. Many of you asked where you can find fake snow after my Walmart post – I’ve found it at Hobby Lobby in years past, and Target this year. Target has decent sized bags for $1.99 each. :)

Thank you to my sponsor!:

Santa hat craft

Hey there! Have you checked out the Holiday Home Mantel Party at Layla’s yet? Some serious inspiration going on!! (You can see ours here.) Even if you don’t have a mantel, you’ll be sure to find some great ideas for your holiday decorating. :)

Late in the season last year I did a Christmas craft that I absolutely LOVE – I wanted to show it to you again in case you wanted to try it out yourself.

I had seen some Santa hats at Stein Mart one day, and just thought they were adorable!:

Killing me. So fun! But I knew I could recreate them myself for less cash, so that I did.

Now I think mine are actually cuter, if I do say so myself:

Santa hat craft

And making them was way cheaper than buying them – score!!

IMG_1952

Since I made them so close to Christmas last year, I just threw them in a tray I had laying around. But this week I found the most adorable tray at Hob Lob and it is just perfect for my cutie hats:

It was only $5 on sale! SCORE again. :)

I filled in around them with some extra Dollar Tree ornaments:

Well hello there!:

well hello!

HA!

My Santa hats are one of my very favorite Christmas decorations. Partly because I made them myself. Partly because they are stinkin’ cauute!:

I’ve heard that some of you have made them with your kids, students and with friends – I LOVE that!! Makes me so happy. :)

For all of the details of how I made these (they were SO simple), check out last year’s post here. If you’ve made them, I’d love to see pictures!

So are you done decorating? It takes me a few days…or maybe a week. :) But I’m trying to take my time and enjoy it, especially since the Bub loves Christmas decor as much as me this year. I have a partner in crime and I love it!


P.S. I can’t believe how much our family room has changed since the pictures in that Santa hat post last year – all because of a $100 Craigslist dresser. ;) Love.


Thank you to my sponsor!:

Santa hat craft

Hey there! Have you checked out the Holiday Home Mantel Party at Layla’s yet? Some serious inspiration going on!! (You can see ours here.) Even if you don’t have a mantel, you’ll be sure to find some great ideas for your holiday decorating. :)

Late in the season last year I did a Christmas craft that I absolutely LOVE – I wanted to show it to you again in case you wanted to try it out yourself.

I had seen some Santa hats at Stein Mart one day, and just thought they were adorable!:

Killing me. So fun! But I knew I could recreate them myself for less cash, so that I did.

Now I think mine are actually cuter, if I do say so myself:

Santa hat craft

And making them was way cheaper than buying them – score!!

IMG_1952

Since I made them so close to Christmas last year, I just threw them in a tray I had laying around. But this week I found the most adorable tray at Hob Lob and it is just perfect for my cutie hats:

It was only $5 on sale! SCORE again. :)

I filled in around them with some extra Dollar Tree ornaments:

Well hello there!:

well hello!

HA!

My Santa hats are one of my very favorite Christmas decorations. Partly because I made them myself. Partly because they are stinkin’ cauute!:

I’ve heard that some of you have made them with your kids, students and with friends – I LOVE that!! Makes me so happy. :)

For all of the details of how I made these (they were SO simple), check out last year’s post here. If you’ve made them, I’d love to see pictures!

So are you done decorating? It takes me a few days…or maybe a week. :) But I’m trying to take my time and enjoy it, especially since the Bub loves Christmas decor as much as me this year. I have a partner in crime and I love it!


P.S. I can’t believe how much our family room has changed since the pictures in that Santa hat post last year – all because of a $100 Craigslist dresser. ;) Love.


Thank you to my sponsor!:

 
coompax-digital magazine